
Build Scalable Laravel 12 Apps with Livewire Starter Kit, Flux UI & WorkOS AuthKit
Table of Contents
Laravel 12 introduces cutting-edge features designed to enhance full-stack development. Whether you're a beginner or an experienced developer, the Livewire Starter Kit streamlines development by offering real-time interactivity, modern UI components, and seamless authentication.
This blog will walk you through building a Laravel 12 application using the Livewire Starter Kit, Flux UI, and WorkOS AuthKit, providing a step-by-step roadmap to boost productivity and enhance security in your projects.
Understanding Laravel Starter Kits
Laravel 12 Starter Kits offer a seamless way to kickstart application development with pre-configured authentication, routes, and UI components. Featuring React, Vue, and Livewire options, these kits integrate modern tools like Inertia.js, TypeScript, Tailwind CSS, and WorkOS AuthKit for secure authentication. Designed to boost efficiency, they simplify user authentication while allowing full customization.
Read Also: Laravel 12: What’s New and Why It Matters for Developers
Step-by-Step Guide to Building a Laravel 12 App with a Starter Kit
-
Check System Requirements
Before you begin, ensure your system has:
- PHP – (8.2+)
- Composer – (Dependency Manager for PHP)
- Laravel Installer – (For quick project setup)
-
Install Laravel Installer
If Laravel is not installed on your machine, use Composer to install it:
composer global require laravel/installer -
Create a New Laravel 12 Project
Run the following command to create a new Laravel 12 app:
laravel new laravel-12-app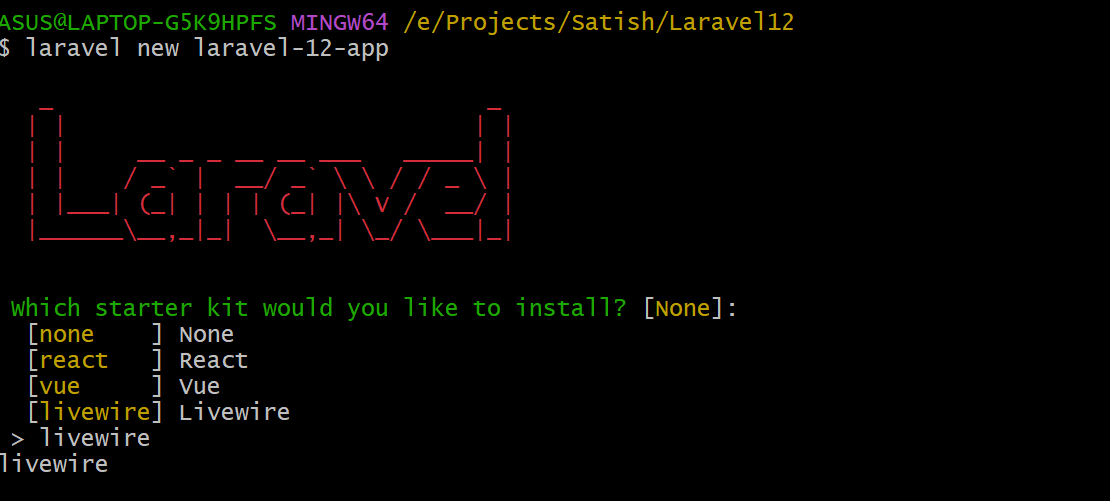
-
To use WorkOS AuthKit, simply select the WorkOS variant when creating your Laravel application with the Laravel installer:

-
Install Frontend Dependencies
Navigate to your project folder and install required dependencies:
                                                cd laravel-12-app

                                                npm install && npm run build
-
Configure Database
Open the .env file and update your database details:
DB_CONNECTION=mysql DB_HOST=127.0.0.1 DB_PORT=3306 DB_DATABASE=<DATABASE NAME> DB_USERNAME=<DATABASE USERNAME> DB_PASSWORD=<DATABASE PASSWORD> -
Run the Migration
Execute the migration to create the defaults table:
php artisan migrate -
Deploying the app
composer run dev
Your application will be available at:
http://localhost:8000
Exploring Livewire: A Powerful Laravel Framework
Livewire is a full-stack framework for Laravel that allows you to build dynamic interfaces directly in PHP. It eliminates the need for complex JavaScript, offering a simple yet powerful way to enhance your applications.
Getting Started with the Livewire Starter Kit
The Livewire Starter Kit is designed with Livewire 3, Laravel Volt, Tailwind CSS, and Flux UI, providing a seamless development experience. It includes both backend and frontend code within your application, ensuring complete flexibility and customization.
An Overview of Laravel Volt & Flux UI
1. Laravel Volt
Laravel Volt is a streamlined framework within Laravel designed to enhance Livewire applications. It simplifies frontend development by eliminating the need for complex JavaScript configurations, offering a blade-like syntax for component-based UI development. Volt ensures faster performance, better reactivity, and a smoother developer experience for building real-time, dynamic applications.
2. Flux UI
Flux UI is a modern Tailwind CSS-based UI component library tailored for Laravel's Livewire ecosystem. It provides a set of pre-styled, reusable UI components that integrate seamlessly with Laravel Volt and Livewire, allowing developers to build stunning interfaces with minimal effort.
3. Key Benefits:
- Faster UI Development – Pre-designed components reduce development time.
- Highly Customizable – Works with Tailwind CSS for easy styling.
- Optimized for Livewire & Volt – Designed to work seamlessly within the Laravel 12 ecosystem.
Implementing Authentication in Laravel 12 with WorkOS AuthKit
Laravel 12 introduces powerful authentication options with WorkOS AuthKit, enhancing the built-in authentication system used by the React, Vue, and Livewire starter kits. By default, these starter kits support essential authentication features like login, registration, password reset, and email verification. However, developers can opt for WorkOS AuthKit to unlock advanced authentication capabilities.
Why Choose WorkOS AuthKit?
With WorkOS AuthKit, Laravel applications gain access to seamless and secure authentication methods, including:
- Social Authentication – Easily integrate with Google, Microsoft, GitHub, and Apple for user sign-ins.
- Passkey Authentication – Enable passwordless logins with advanced passkey support.
- Magic Link Authentication – Allow users to log in via email-based "Magic Auth" without passwords.
- Single Sign-On (SSO) – Support enterprise authentication with SSO for enhanced security.
- Scalability – WorkOS provides free authentication for applications with up to 1 million monthly active users.
Steps to Create an Account on WorkOS
Follow these simple steps to create an account on WorkOS and start integrating authentication services into your Laravel 12 application.
Step 1: Visit the WorkOS Website
Go to workos.com and click on the "Get Started" button.
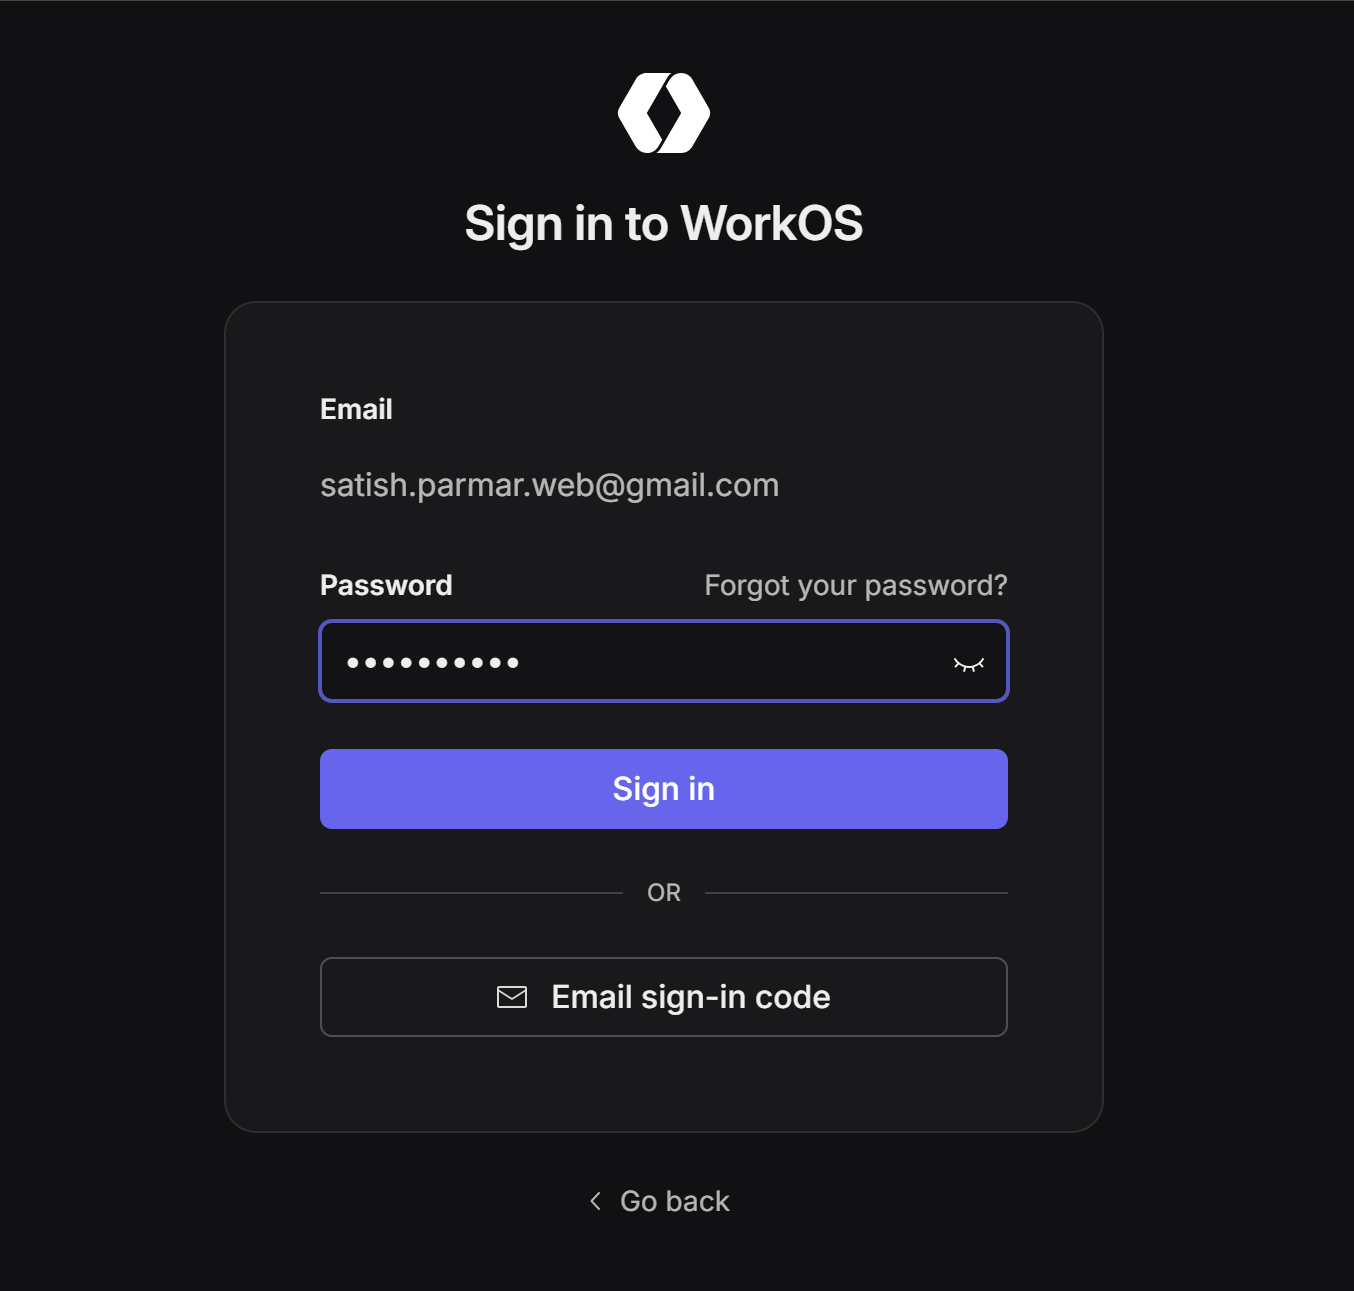
Step 2: Sign Up for an Account
You can sign up using:
- Your Email Address (Enter your details and create a password)
- Google Account (Sign in directly with Google)
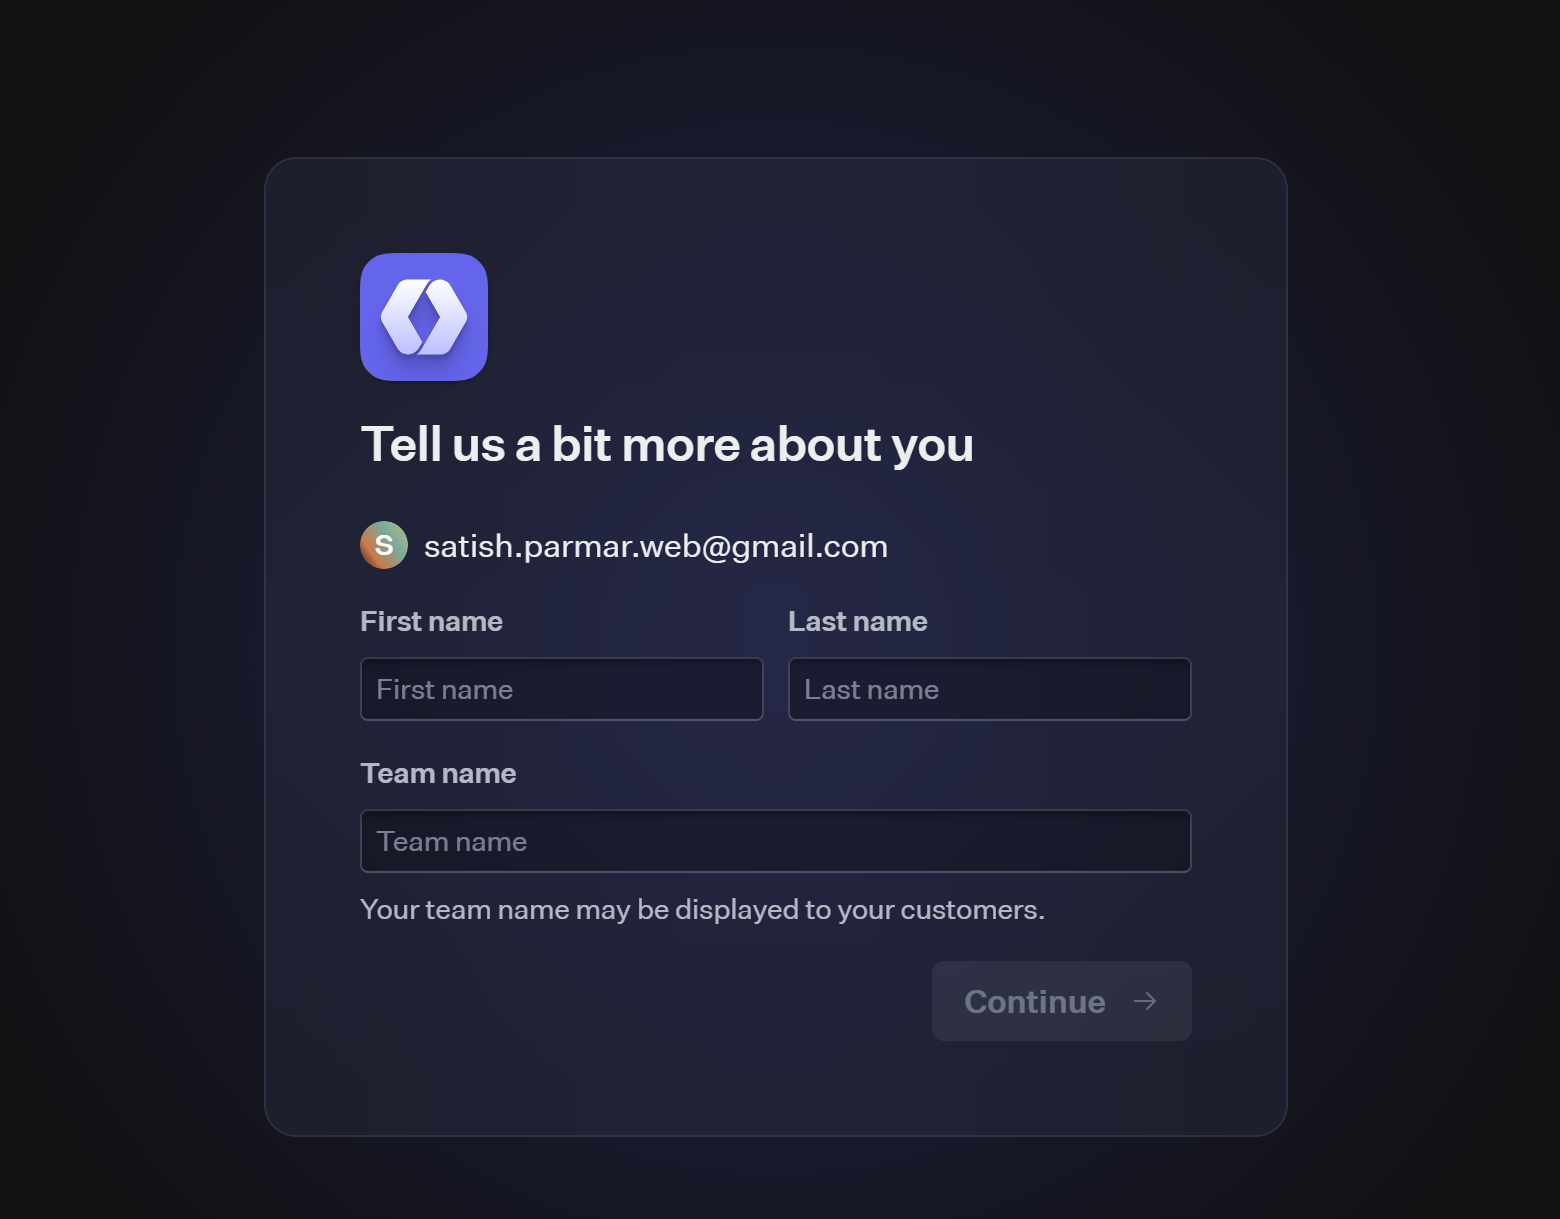
Next, give it a First and Last name, and Team name configure the authentication settings as needed.
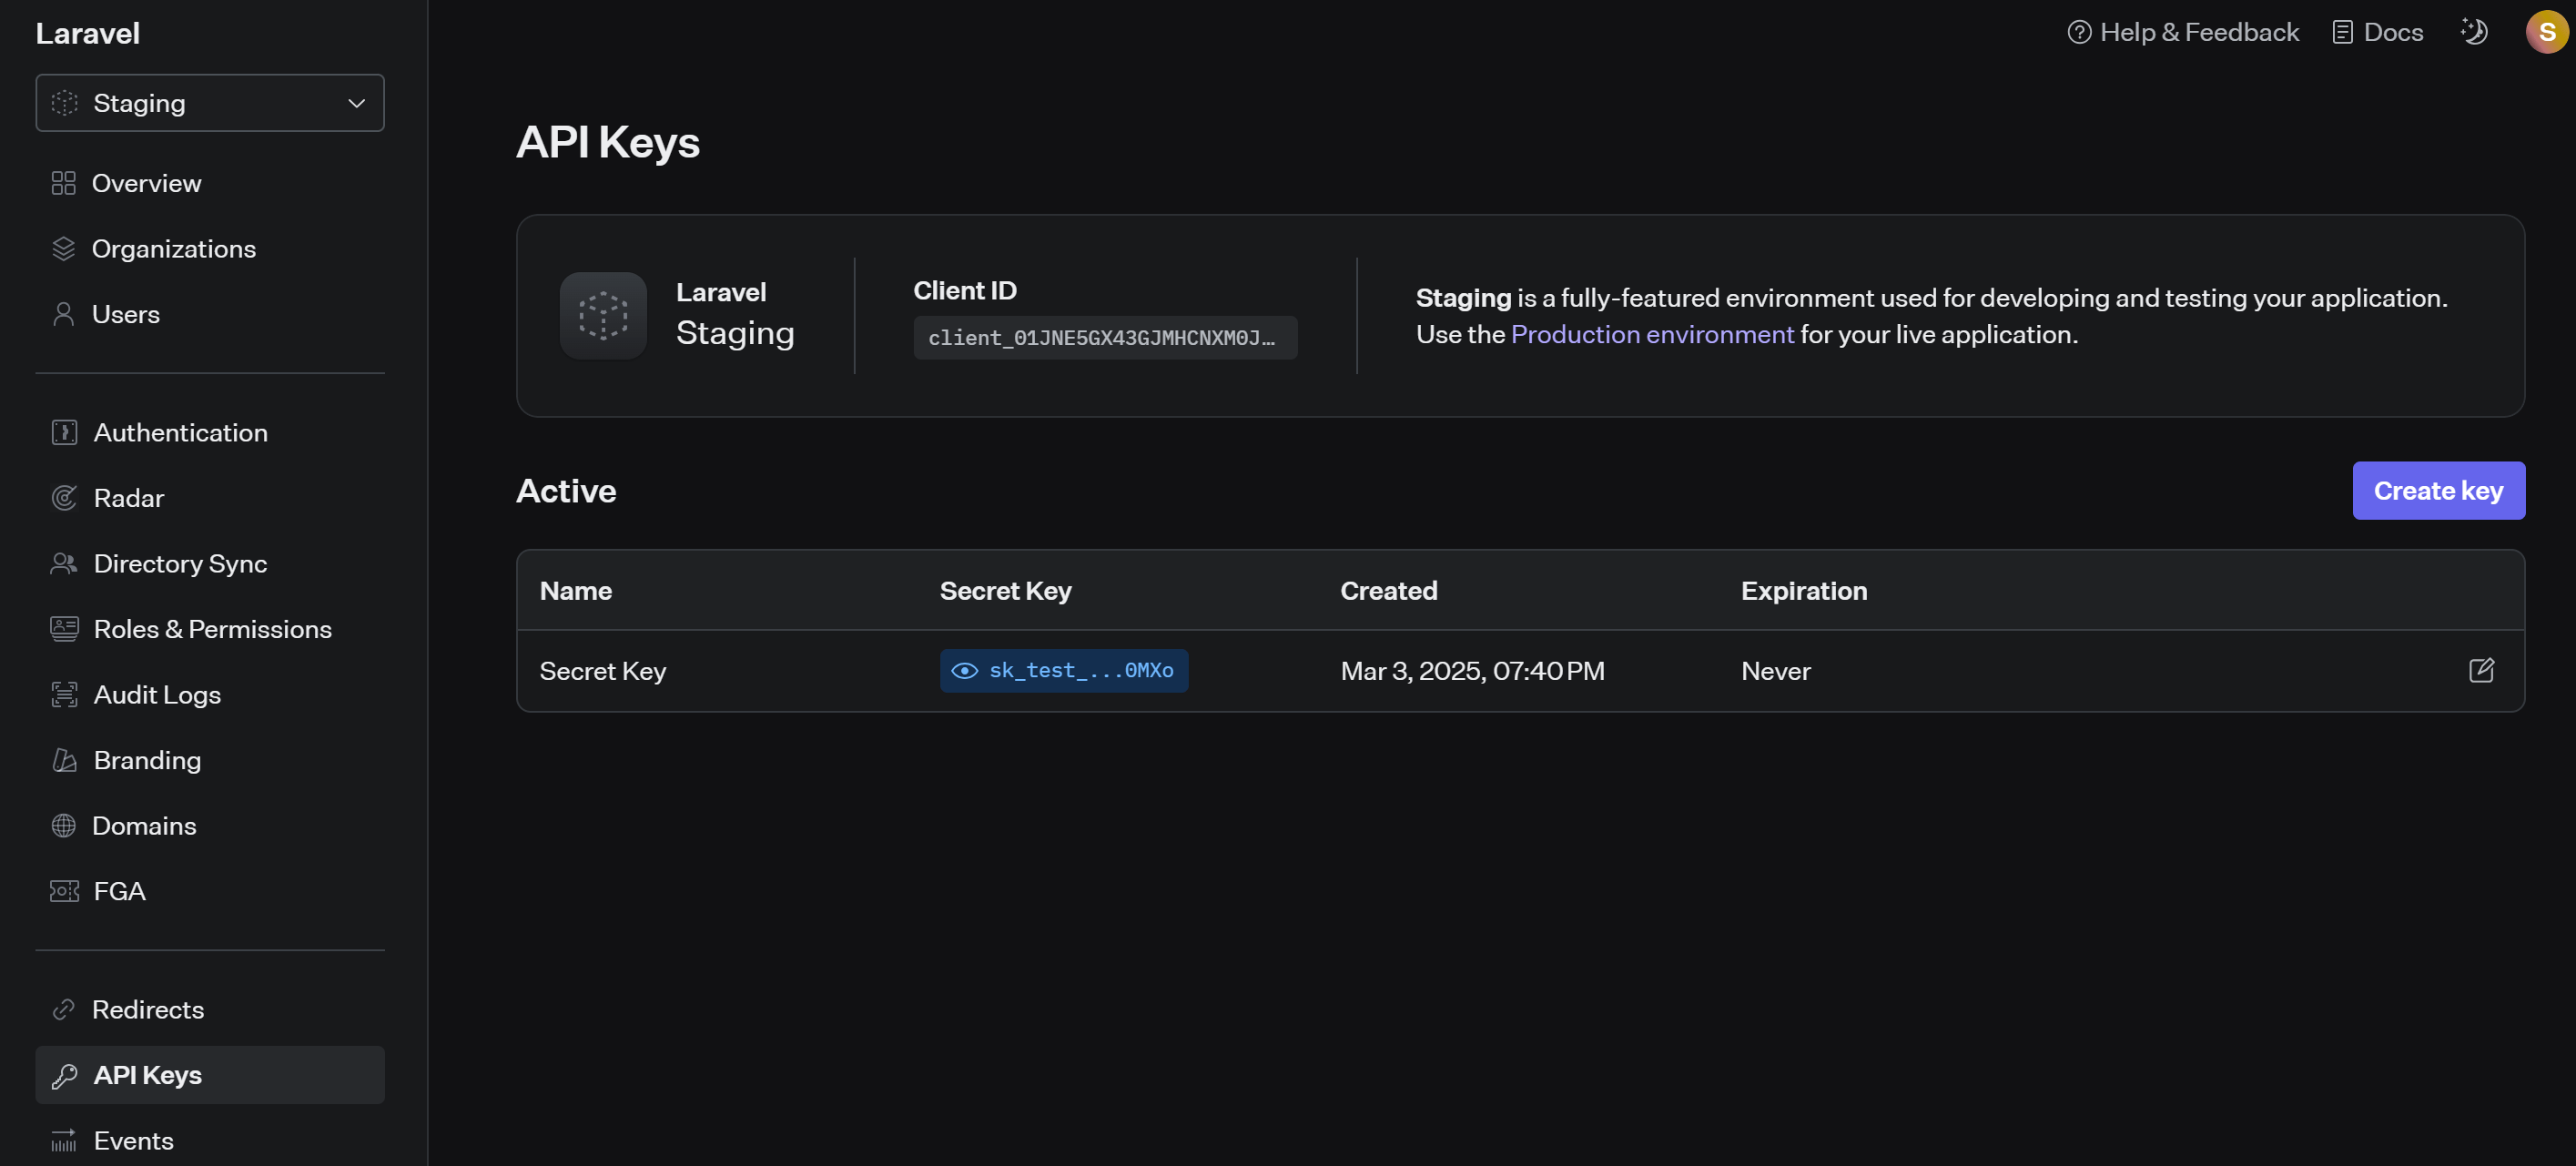
Step 3: Obtain API Credentials
Navigate to the API Keys section in the dashboard and copy your Client ID, API Key, and Redirect URL for integration with Laravel.
Step 4: Configure Your Application
Use these credentials in your Laravel application by setting the following environment variables in the .env file:
                                        WORKOS_CLIENT_ID=your-client-id
                                        WORKOS_API_KEY=your-api-key
                                        WORKOS_REDIRECT_URL="${APP_URL}/authenticate"
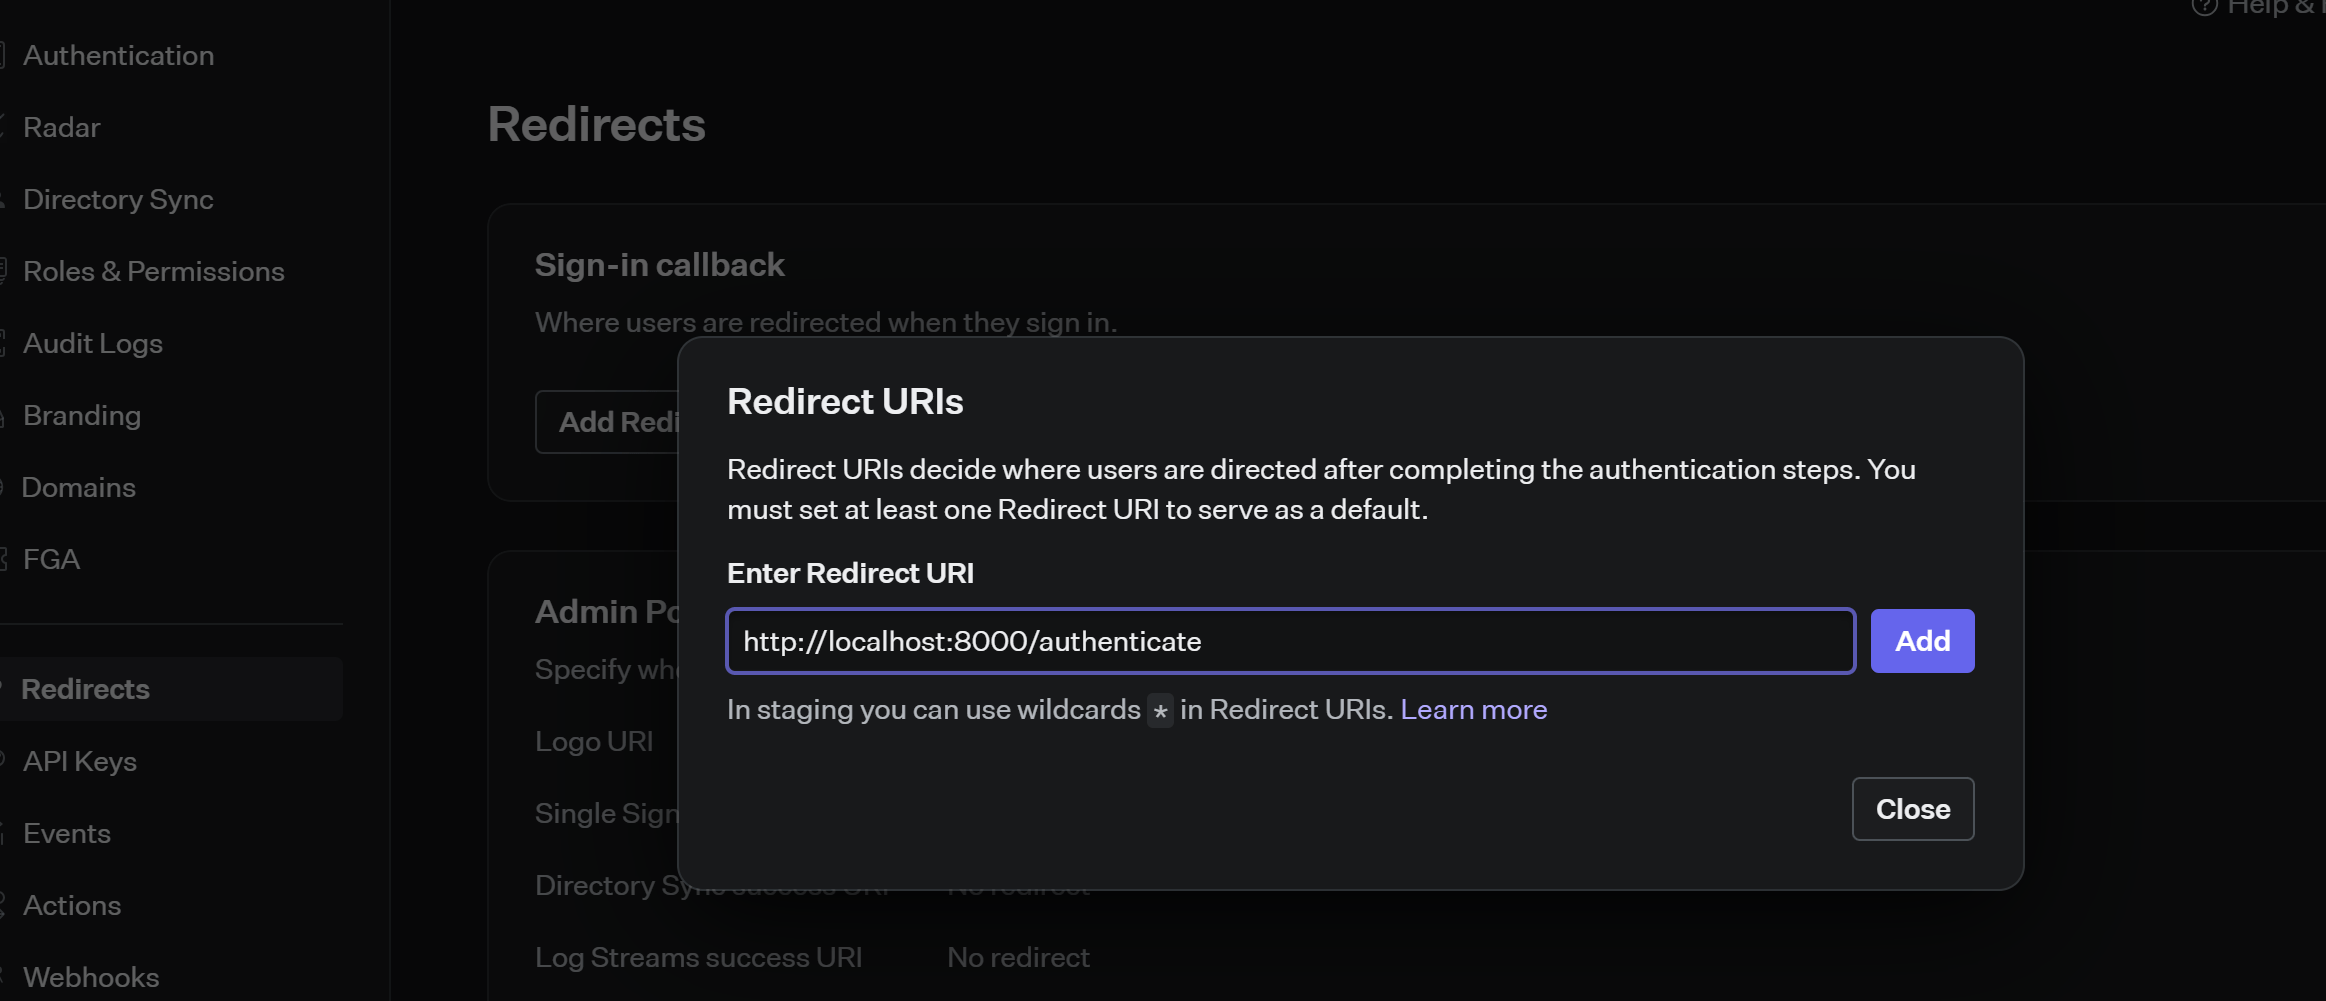
Step 5: Configure Redirect URIs
If you encounter the error "Invalid redirect URI" when clicking the login link,
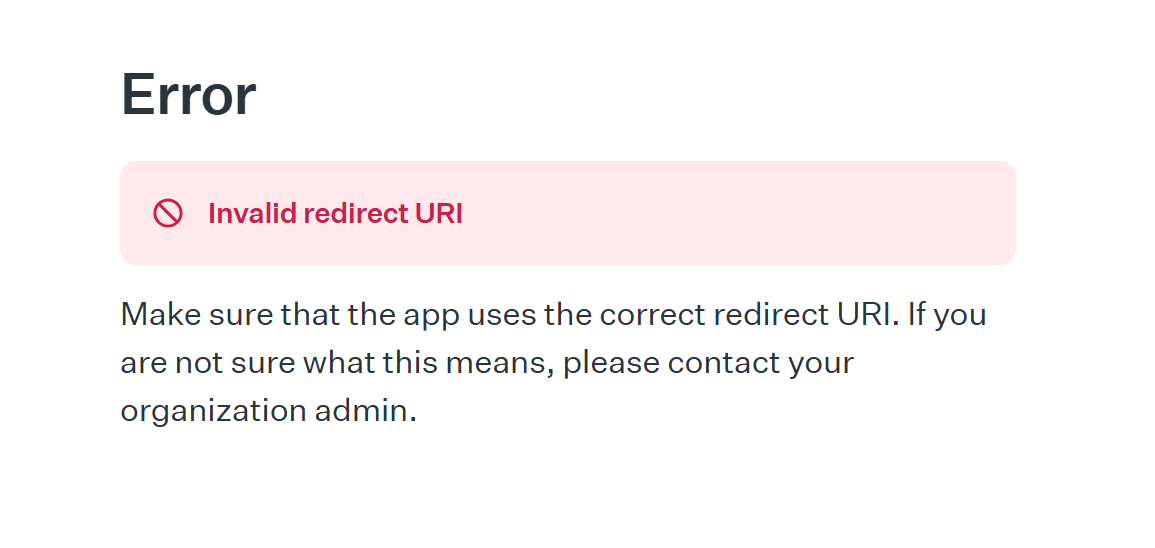
go to the Redirects section in your WorkOS dashboard and add http://localhost:8000/authenticate as your Redirect URL for proper Laravel integration
Preview the Application
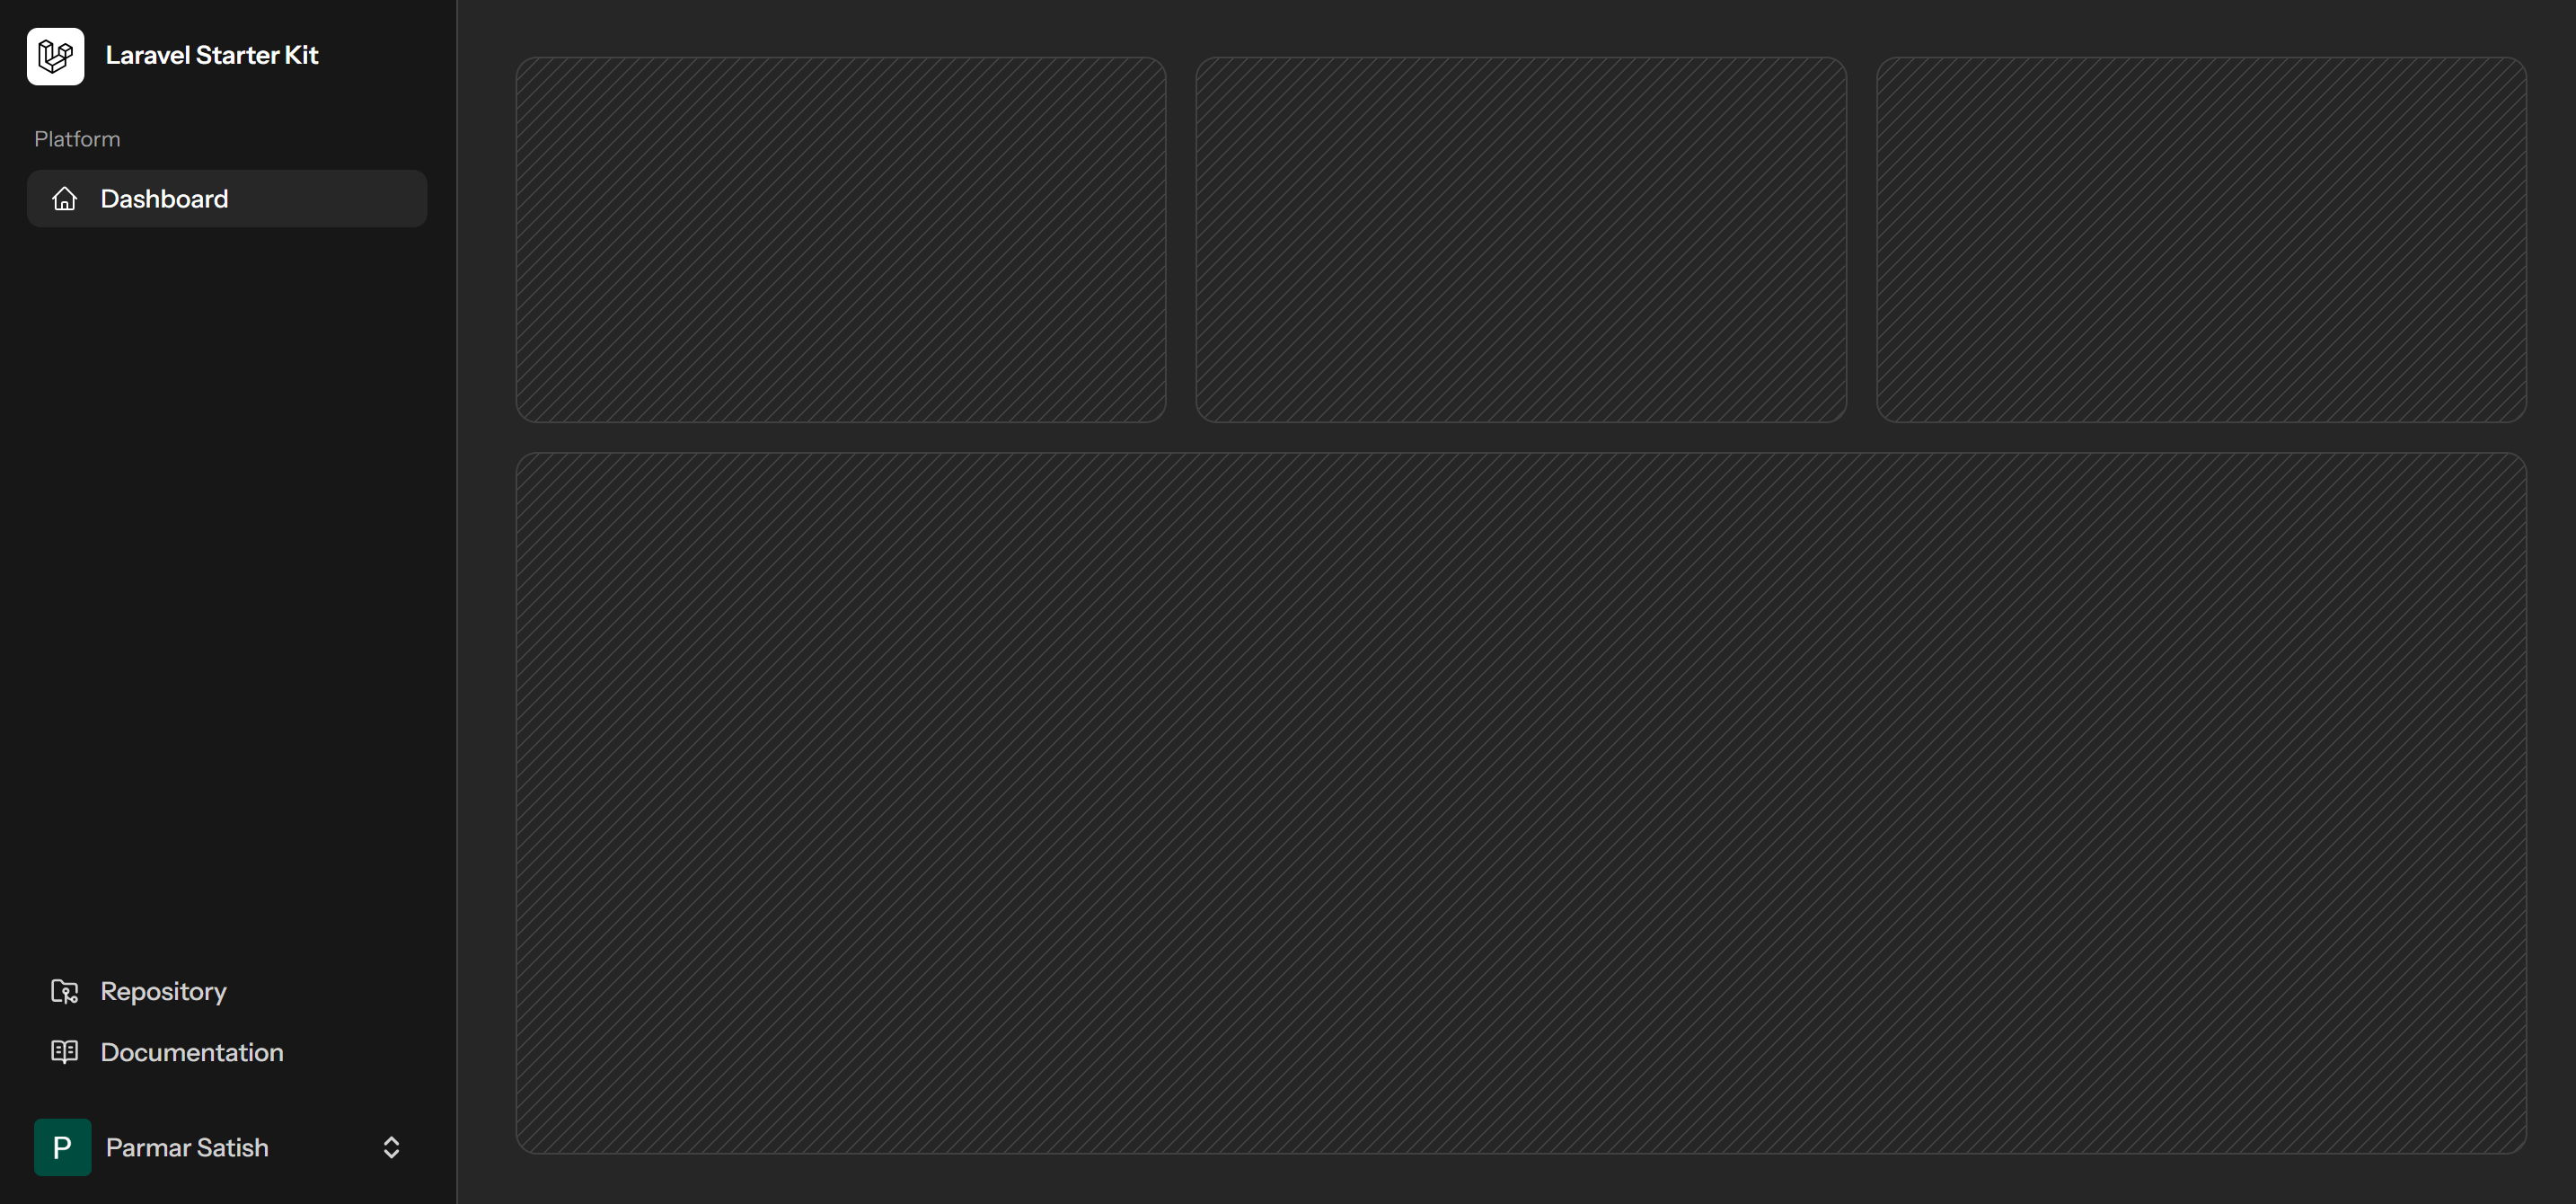
That's it! You've successfully created a WorkOS account and are ready to integrate authentication into your Laravel 12 app.
Conclusion
Laravel 12, combined with Livewire, Volt, Flux UI, and WorkOS AuthKit, provides a powerful ecosystem for building modern, scalable, and secure web applications. The starter kits streamline development by offering pre-built authentication, dynamic UI components, and seamless integration with external authentication providers.
By following the step-by-step guide in this blog, you can quickly set up a Laravel 12 application and leverage these tools to enhance your development workflow. Whether you're a beginner or an experienced developer, this ecosystem simplifies complex processes, allowing you to focus on building feature-rich applications efficiently.
Start exploring Laravel 12 today and unlock new possibilities for your projects!


0 Comments