Laravel 12 REST API Tutorial: Build a CRUD API Step-by-Step
Table of Contents
In this guide, you'll learn How to Create a REST API Using Laravel 12. Whether you're a beginner diving into API development or an experienced developer refining your skills, this step-by-step tutorial will walk you through building a fully functional CRUD (Create, Read, Update, Delete) API from scratch.
Laravel 12 provides powerful tools for API development, including built-in authentication, efficient routing, and seamless database management. By following this guide, you'll gain hands-on experience in setting up routes, controllers, models, seeders and authentication for a scalable API.
What is a RESTful API?
A RESTful API (or REST API) is a standardized way for applications to communicate over the web. The term REST stands for Representational State Transfer, which simply means it follows a set of rules for sending and receiving data.
A REST API allows applications to perform the following actions:
- GET: Retrieve data
- POST: Add new data
- PUT: Update existing data
- DELETE: Remove data
Why REST APIs?
- Flexible: Works with both web and mobile applications
- Standardized: Uses universal HTTP methods
- Efficient: Transfers lightweight data (usually JSON)
RESTful APIs are widely used in modern web and mobile applications due to their simplicity, flexibility, and scalability.
Read Also: Laravel 12 AJAX CRUD Example : A Step-by-Step Guide
Step 1: Setting Up Laravel 12 Project
Start by creating a new Laravel 12 project: create one with Composer:
composer create-project --prefer-dist laravel/laravel laravel12-employee-api
Navigate to the app directory by running the following command in your terminal
cd laravel12-employee-api
Step 2: Database Configuration
By default, Laravel 12 uses SQLite, but you can configure MySQL or another database in the .env file:
                                        DB_CONNECTION=mysql
                                        DB_HOST=127.0.0.1
                                        DB_PORT=3306
                                        DB_DATABASE=<DATABASE NAME> #example : laravel12_employee_api
                                        DB_USERNAME=<DATABASE USERNAME> #example : root
                                        DB_PASSWORD=<DATABASE PASSWORD>
Ensure your database is created before proceeding.
Step 3: Create API File in Routes
In Laravel 12, you can easily set up API routes using a built-in command that generates the api.php file inside the routes folder. Run the following command to create and configure your API routes:
php artisan install:api
Step 4: Generate a Model and Migration File
-
Generate a Model and Migration
Run the following Artisan command to create the Employee model and its corresponding migration file:
php artisan make:model Employee -m -
Update the Employee Model
Define relationships and fillable fields in app/Models/Employee.php:
namespace App\Models; use Illuminate\Database\Eloquent\Model; class Employee extends Model { protected $table = 'employees'; protected $fillable = [ 'name', 'email', 'phone', ]; public function getCreatedAtAttribute($value) { return \Carbon\Carbon::parse($value)->format('d-m-Y'); // Customize as needed } } -
Define the Migration Schema
Update the database/migrations/xxxx_xx_xx_create_employees_table.php file:
use Illuminate\Database\Migrations\Migration; use Illuminate\Database\Schema\Blueprint; use Illuminate\Support\Facades\Schema; return new class extends Migration { /** * Run the migrations. */ public function up(): void { Schema::create('employees', function (Blueprint $table) { $table->id(); $table->string('name'); $table->string('email'); $table->string('phone'); $table->timestamps(); }); } /** * Reverse the migrations. */ public function down(): void { Schema::dropIfExists('employees'); } }; -
Run the Migration
To create tables in your Laravel project, execute the following command:
php artisan migrate
Step 5: Create a Controller
Generate a resource controller using the following Artisan command. This controller will handle the logic for Create, Read, Update, and Delete (CRUD) operations.
php artisan make:controller EmployeeController --resource
Define CRUD Methods in EmployeeController.php
Imagine you're building an Employee Management System. Here's how REST APIs work:
Write methods in the controller to handle CRUD operations.
-
Index Method (Retrieves list of all employees).
public function index(Request $request) { $employees = Employee::all(); return response()->json([ 'status' => true, 'message' => 'Employee Fetched successfully', 'data' => $employees ], 200); } -
Store Method (Validate and Create New Employee).
public function store(Request $request) { $validator = Validator::make($request->all(), [ 'name'=> 'required|max:191', 'email'=>'required|email|max:191|unique:employees', 'phone'=>'required|max:10|min:10', ]); if($validator->fails()) { return response()->json([ 'status' => false, 'message' => 'Validation error', 'errors'=>$validator->messages() ],422); } $employee = new Employee; $employee->name = $request->input('name'); $employee->email = $request->input('email'); $employee->phone = $request->input('phone'); $employee->save(); return response()->json([ 'status' => true, 'message' => 'Employee created successfully', 'data' => $employee ], 201); } -
Show Method (Fetch a single employee record).
public function show(Request $request, string $id) { $employee = Employee::find($id); if($employee) { return response()->json([ 'status' => true, 'message' => 'Employee found successfully', 'data' => $employee ], 200); } else { return response()->json([ 'status' => false, 'message' => 'No Employee Found.', ],404); } } -
Update Method (Validate and update employee details).
public function update(Request $request, string $id) { $validator = Validator::make($request->all(), [ 'name'=> 'required|max:191', 'email'=>'required|email|max:191|unique:employees,email,'.$id, 'phone'=>'required|max:10|min:10', ]); if($validator->fails()) { return response()->json([ 'status'=> false, 'message' => 'Validation error', 'errors'=>$validator->messages() ],422); } $employee = Employee::find($id); if($employee) { $employee->name = $request->input('name'); $employee->email = $request->input('email'); $employee->phone = $request->input('phone'); $employee->update(); return response()->json([ 'status' => true, 'message' => 'Employee updated successfully', 'data' => $employee ], 200); } else { return response()->json([ 'status' => false, 'message' => 'No Employee Found.', ],404); } } -
Destroy Method (Delete an employee record).
                                                public function destroy(string $id)
                                                {
                                                   $employee = Employee::find($id);
                                                    if($employee)
                                                    {
                                                        $employee->delete();
                                                        return response()->json([
                                                            'status' => true,
                                                            'message' => 'Employee deleted successfully'
                                                        ], 200);
                                                    }
                                                    else
                                                    {
                                                        return response()->json([
                                                            'status' => false,
                                                            'message' => 'No Employee Found.',
                                                        ],404);
                                                    }
                                                }
Open the generated file EmployeeController.php and update it as follows:
namespace App\Http\Controllers;
use Illuminate\Http\Request;
use App\Models\Employee;
use Illuminate\Support\Facades\Validator;
class EmployeeController extends Controller
{
/**
* Display a listing of the resource.
*/
public function index(Request $request)
{
$employees = Employee::all();
return response()->json([
'status' => true,
'message' => 'Employee Fetched successfully',
'data' => $employees
], 200);
}
/**
* Store a newly created resource in storage.
*/
public function store(Request $request)
{
$validator = Validator::make($request->all(), [
'name'=> 'required|max:191',
'email'=>'required|email|max:191|unique:employees',
'phone'=>'required|max:10|min:10',
]);
if($validator->fails())
{
return response()->json([
'status' => false,
'message' => 'Validation error',
'errors'=>$validator->messages()
],422);
}
$employee = new Employee;
$employee->name = $request->input('name');
$employee->email = $request->input('email');
$employee->phone = $request->input('phone');
$employee->save();
return response()->json([
'status' => true,
'message' => 'Employee created successfully',
'data' => $employee
], 201);
}
/**
* Display the specified resource.
*/
public function show(Request $request, string $id)
{
$employee = Employee::find($id);
if($employee)
{
return response()->json([
'status' => true,
'message' => 'Employee found successfully',
'data' => $employee
], 200);
}
else
{
return response()->json([
'status' => false,
'message' => 'No Employee Found.',
],404);
}
}
/**
* Update the specified resource in storage.
*/
public function update(Request $request, string $id)
{
$validator = Validator::make($request->all(), [
'name'=> 'required|max:191',
'email'=>'required|email|max:191|unique:employees,email,'.$id,
'phone'=>'required|max:10|min:10',
]);
if($validator->fails())
{
return response()->json([
'status'=> false,
'message' => 'Validation error',
'errors'=>$validator->messages()
],422);
}
$employee = Employee::find($id);
if($employee)
{
$employee->name = $request->input('name');
$employee->email = $request->input('email');
$employee->phone = $request->input('phone');
$employee->update();
return response()->json([
'status' => true,
'message' => 'Employee updated successfully',
'data' => $employee
], 200);
}
else
{
return response()->json([
'status' => false,
'message' => 'No Employee Found.',
],404);
}
}
/**
* Remove the specified resource from storage.
*/
public function destroy(string $id)
{
$employee = Employee::find($id);
if($employee)
{
$employee->delete();
return response()->json([
'status' => true,
'message' => 'Employee deleted successfully'
], 200);
}
else
{
return response()->json([
'status' => false,
'message' => 'No Employee Found.',
],404);
}
}
}
Step 6: Define Routes
Define the route in routes/api.php
                                            use App\Http\Controllers\EmployeeController;

                                            Route::get('employees', [EmployeeController::class, 'index']);
                                            Route::get('employees/{id}', [EmployeeController::class, 'show']);
                                            Route::post('employees', [EmployeeController::class, 'store']);
                                            Route::put('employees/update/{id}', [EmployeeController::class, 'update']);
                                            Route::delete('employees/delete/{id}', [EmployeeController::class, 'destroy']);
Step 7: Creating and Running Seeders
In this step, we'll create seeders to populate the database with initial data for Employee.
Seeders are useful for testing and setting up default data in your application.
-
Employee Seeder
Generate the Employee seeder using the following Artisan command:
php artisan make:seed EmployeeTableSeederOpen the generated file database/seeders/EmployeeTableSeeder.php and add the following code:
namespace Database\Seeders; use Illuminate\Database\Console\Seeds\WithoutModelEvents; use Illuminate\Database\Seeder; use App\Models\Employee; class EmployeeTableSeeder extends Seeder { /** * Run the database seeds. */ public function run(): void { $facker = \Faker\Factory::create(); for($i=0; $i < 10; $i++){ Employee::create([ 'name' => $facker->name, 'email'=> $facker->email, 'phone'=> $facker->numerify('##########'), // Generates a 10-digit number ]); } } } -
Update the Database Seeder
Open the database/seeders/DatabaseSeeder.php file and update it to call the Employee seeders:
namespace Database\Seeders; use Illuminate\Database\Seeder; class DatabaseSeeder extends Seeder { public function run() { $this->call([ EmployeeTableSeeder::class, ]); } } -
Run the Seeders
Run the following commands to execute the seeders and populate the database:
php artisan db:seed --class=EmployeeTableSeederAlternatively, you can run all seeders at once using:
php artisan db:seed
Step 8: Running the Application
-
Run the Project
Start the development server:
php artisan serve -
Preview the Application
Open your web browser and navigate to the following URL to view the code preview:
http://localhost:8000
Step 9: Testing with Postman
Using Postman to Test API Endpoints
GET Request: Fetch all employees
GET http://localhost:8000/api/employees

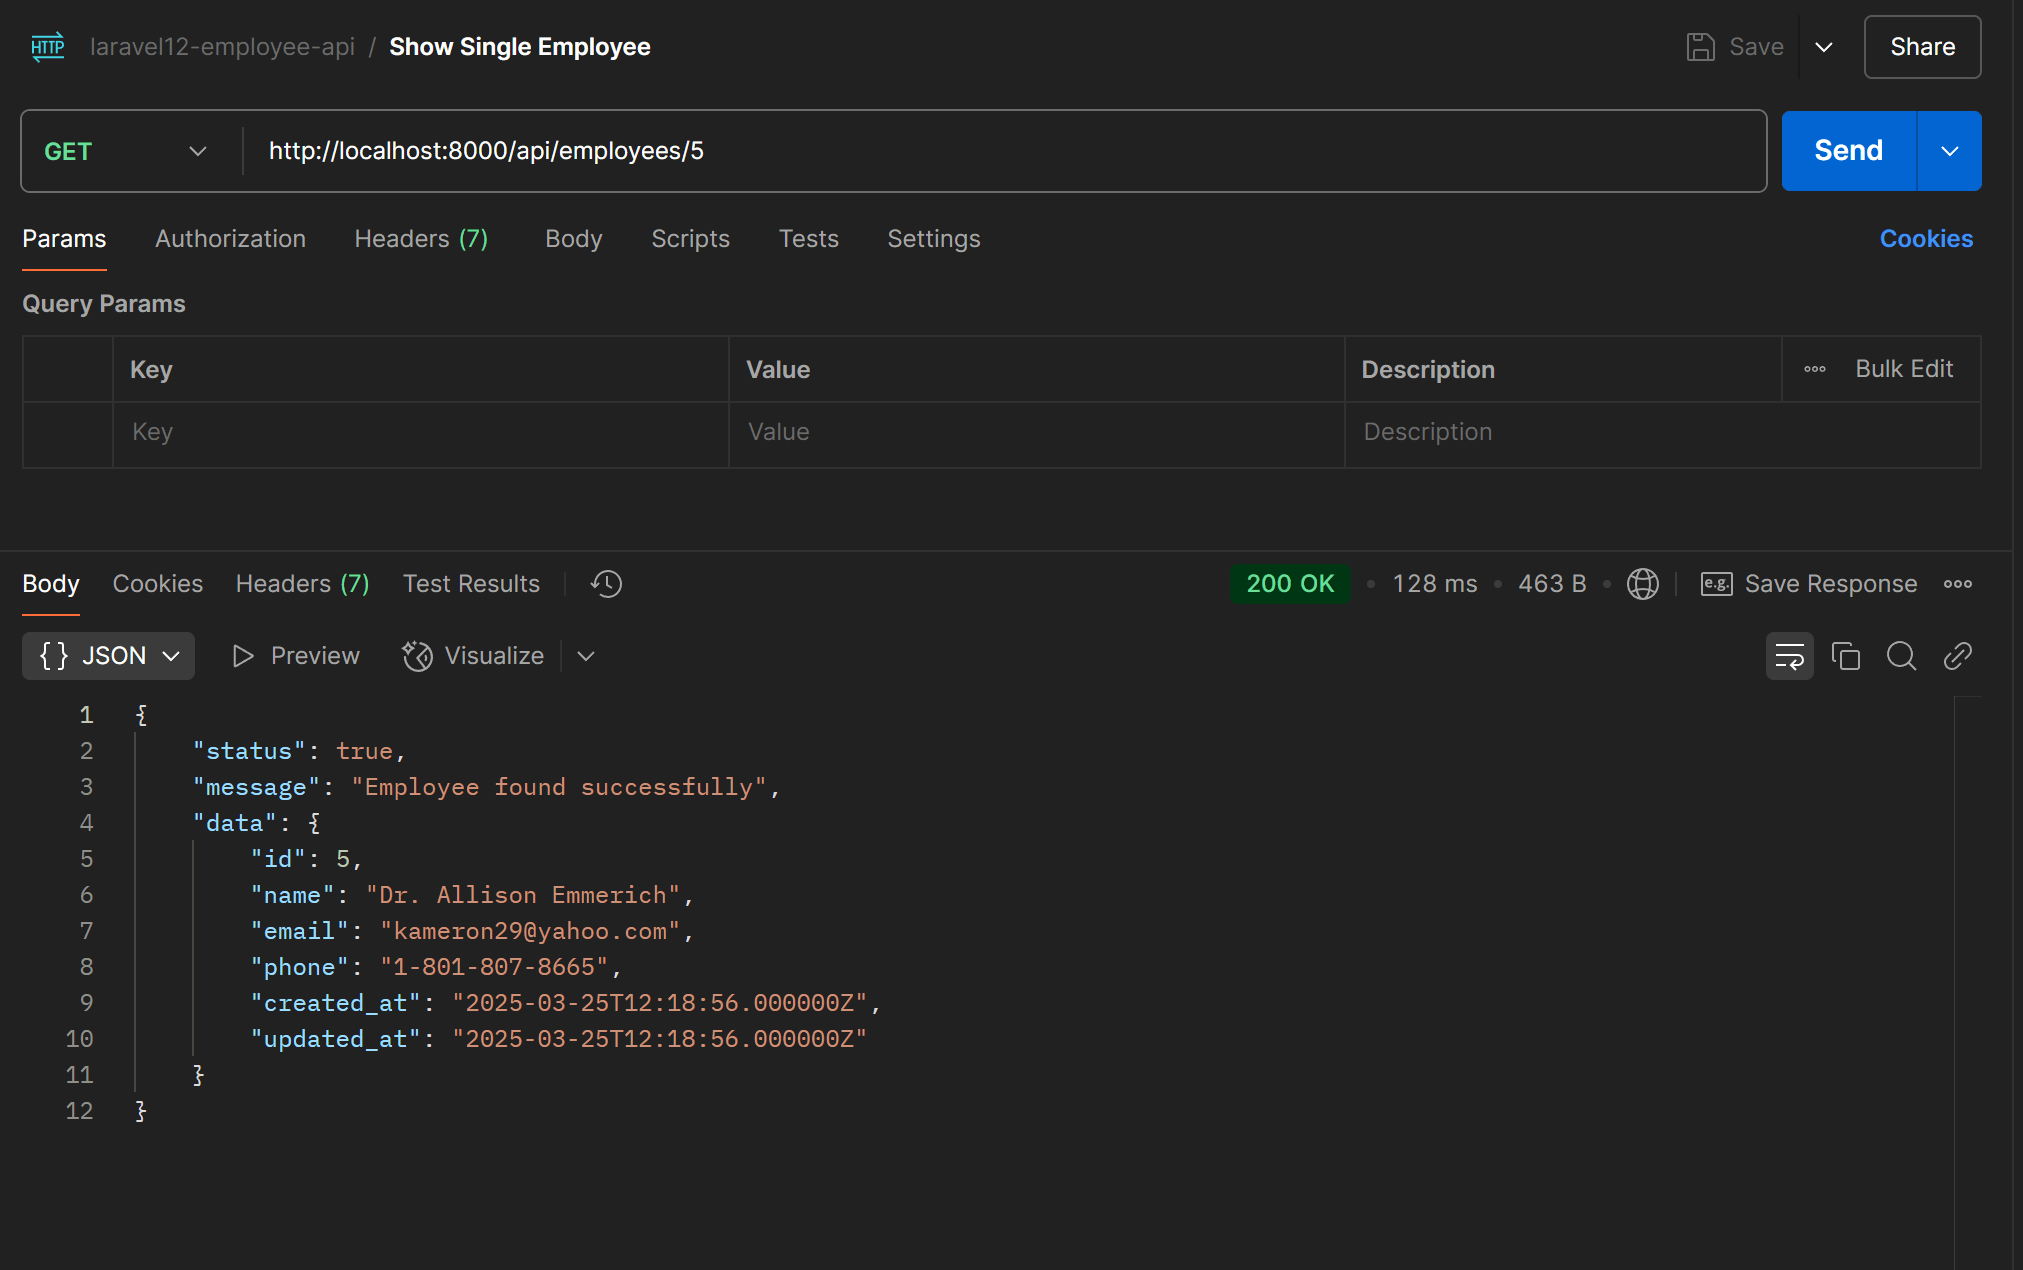
GET Request: Fetch employee by ID
GET http://localhost:8000/api/employees/{id}
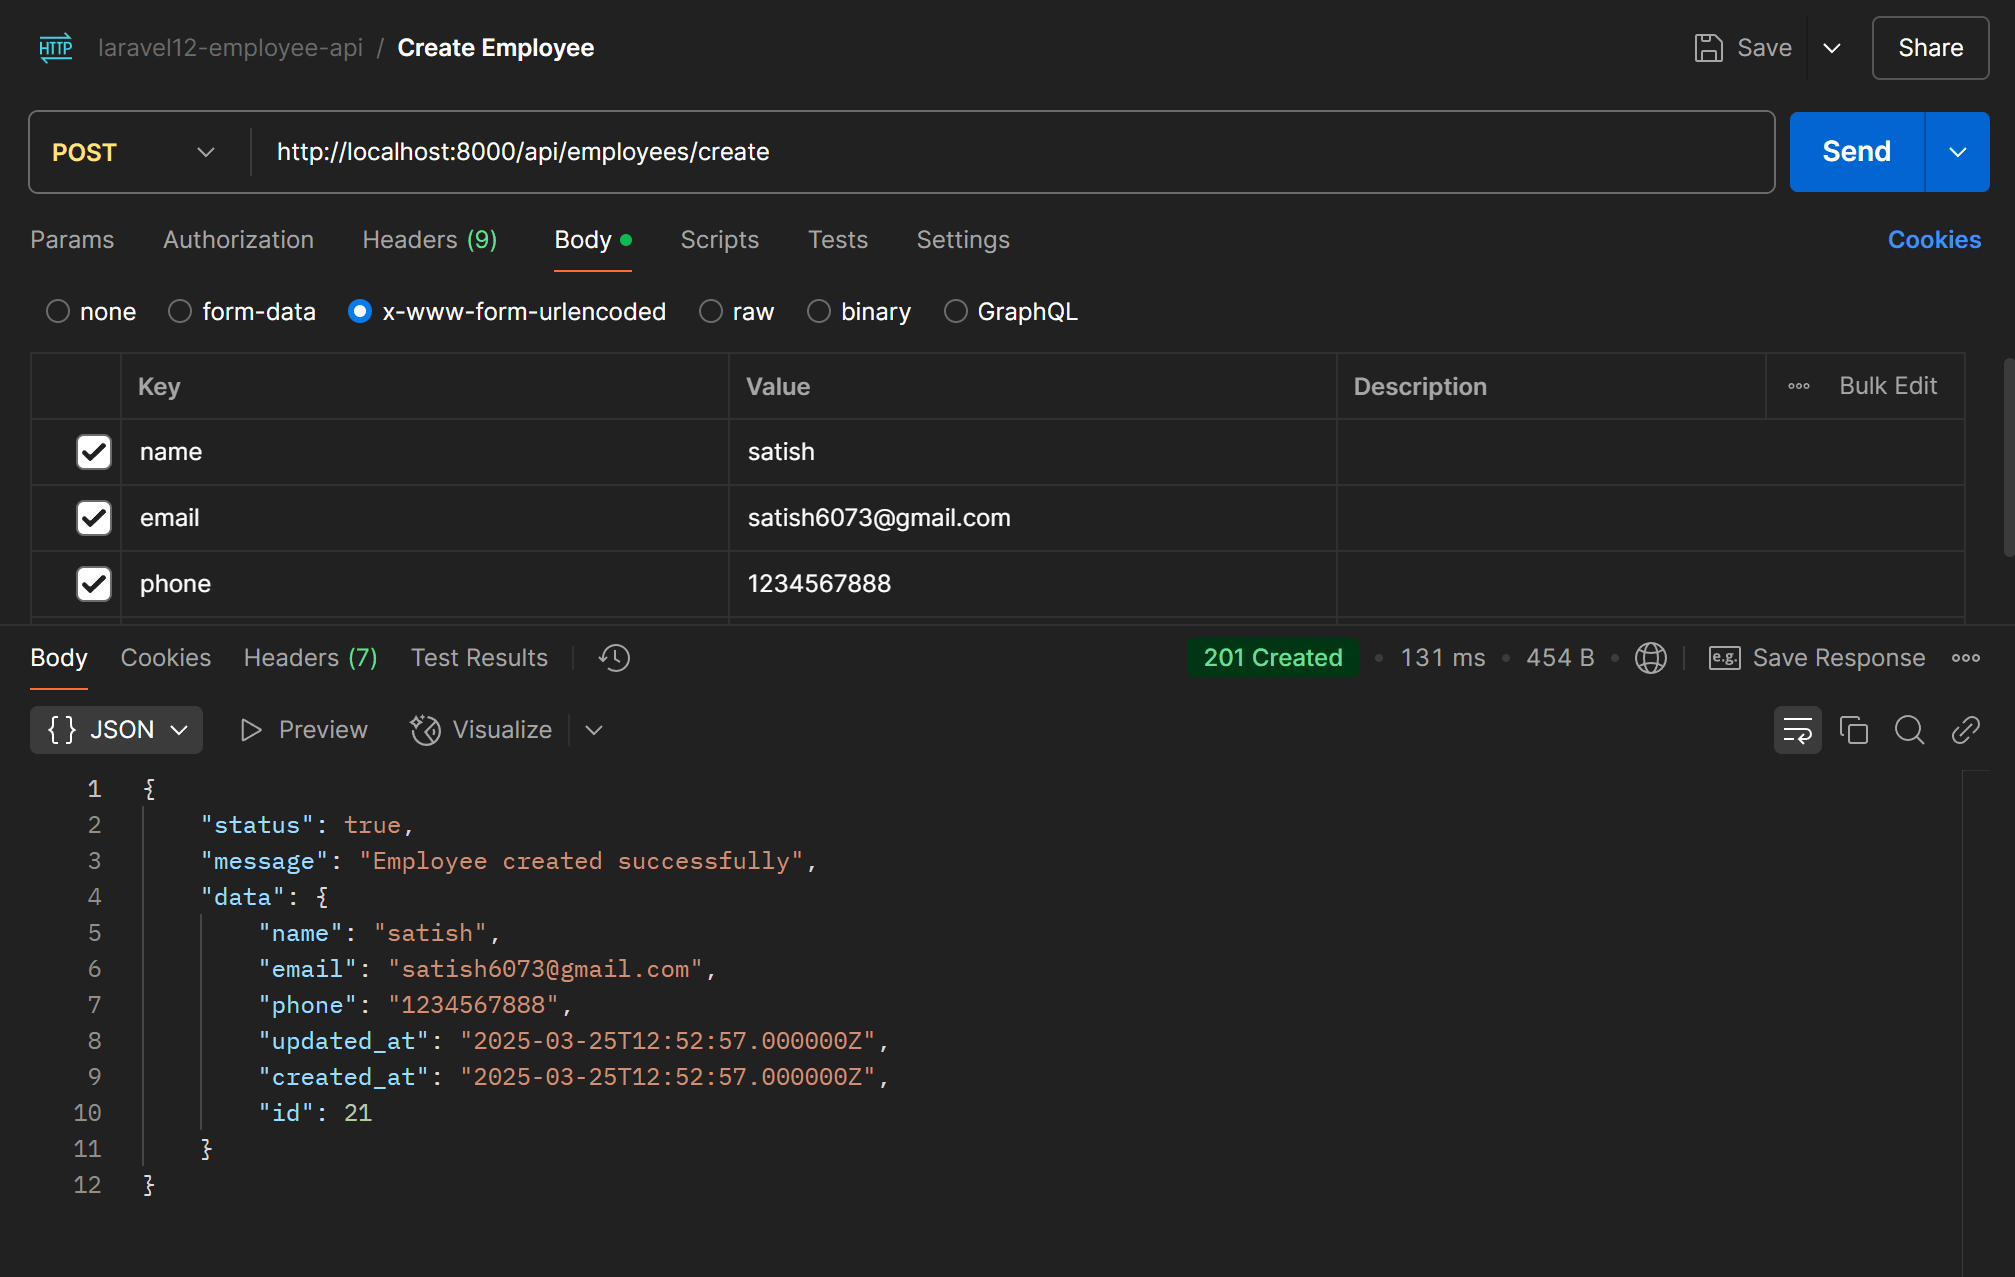
POST Request: Create a new employee (with JSON payload)
POST http://localhost:8000/api/employees/create
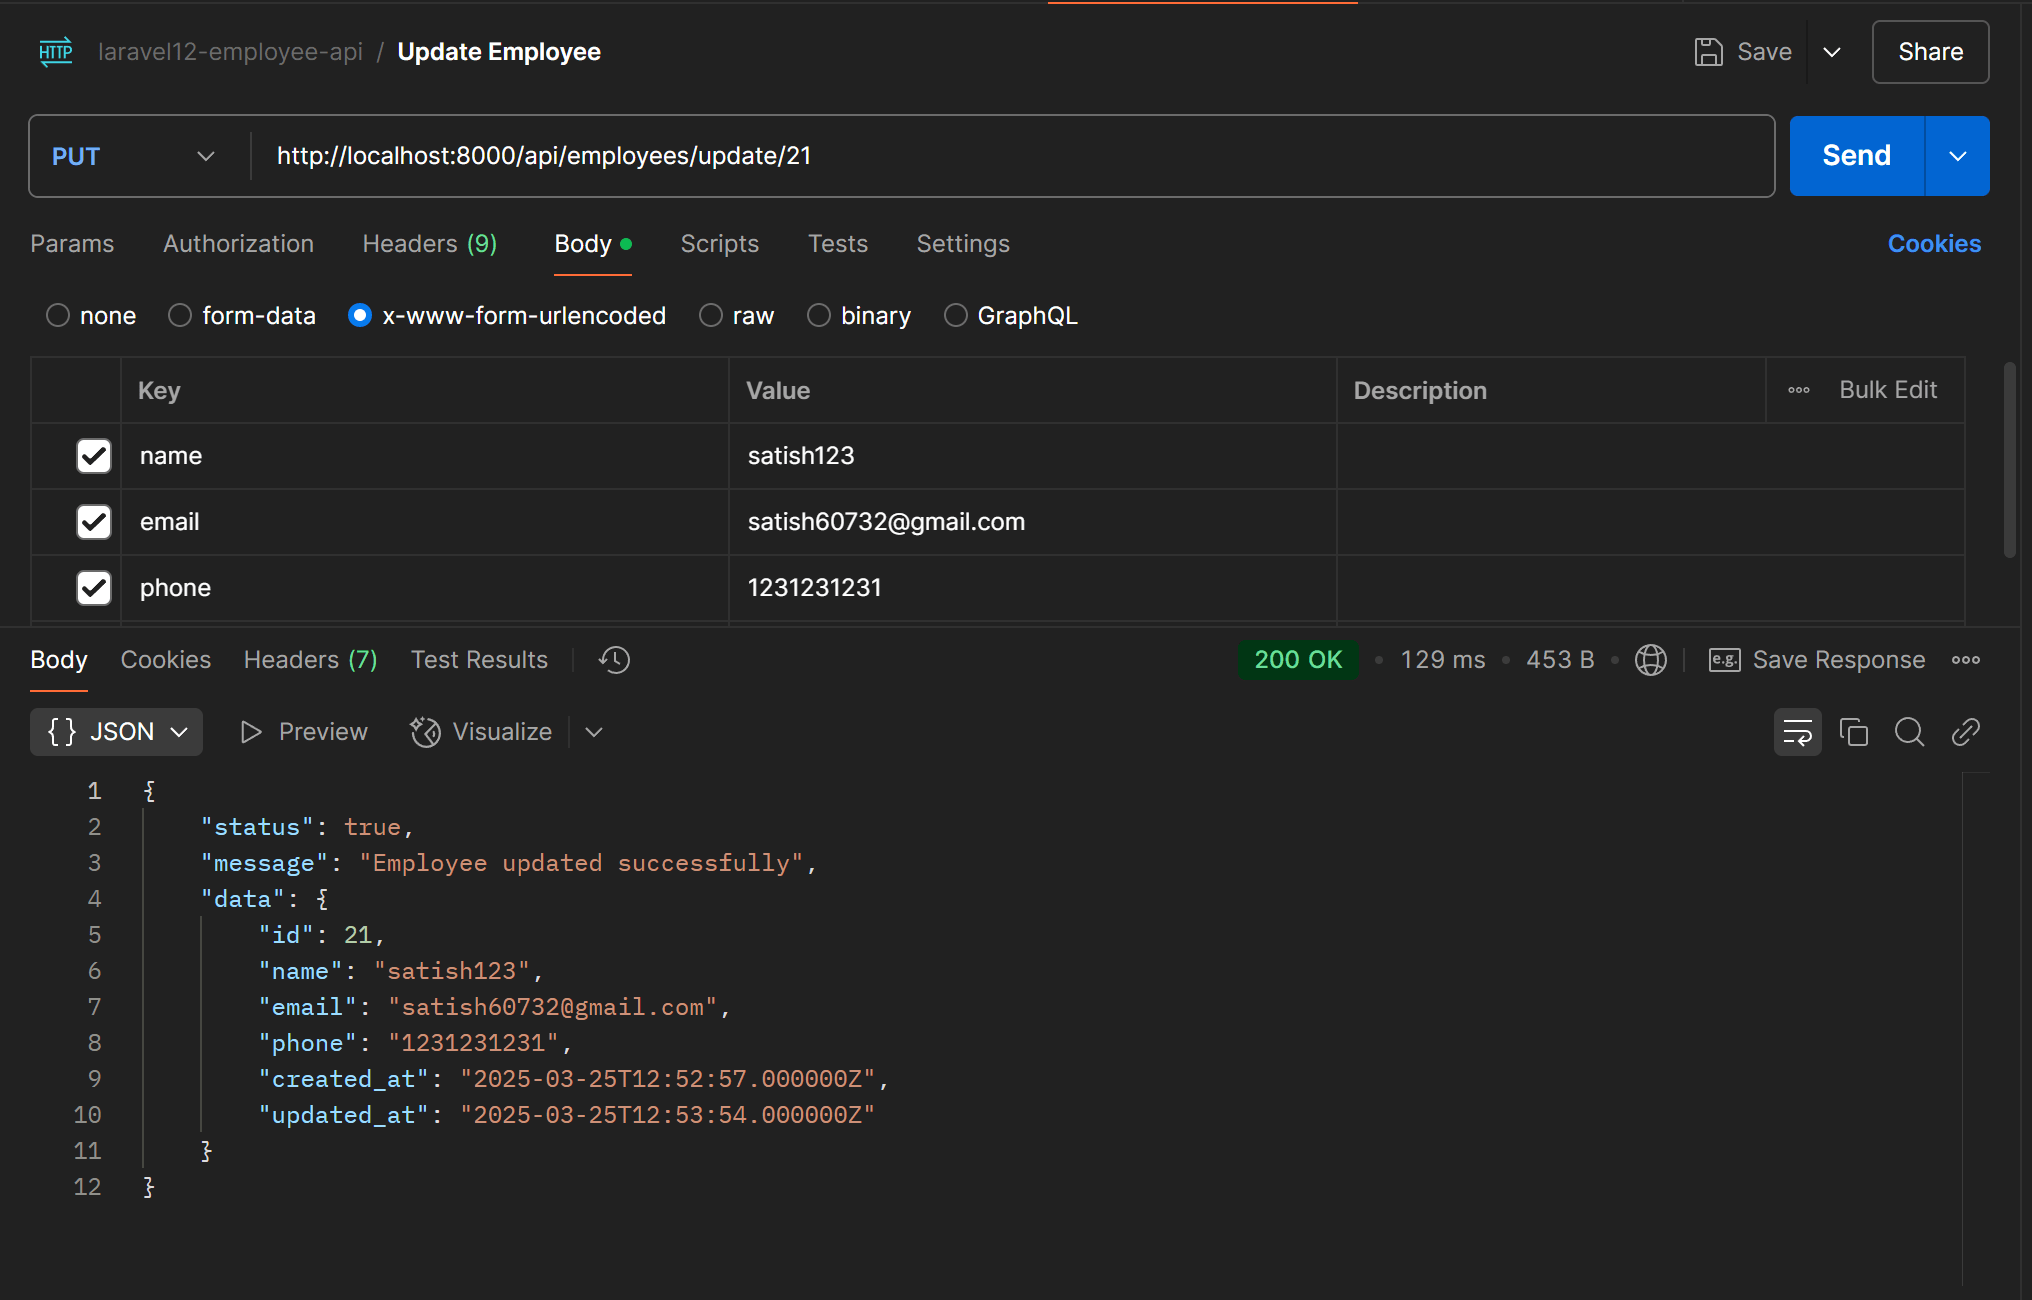
PUT Request: Update an existing employee (with updated JSON payload)
PUT http://localhost:8000/api/employees/update/{id}
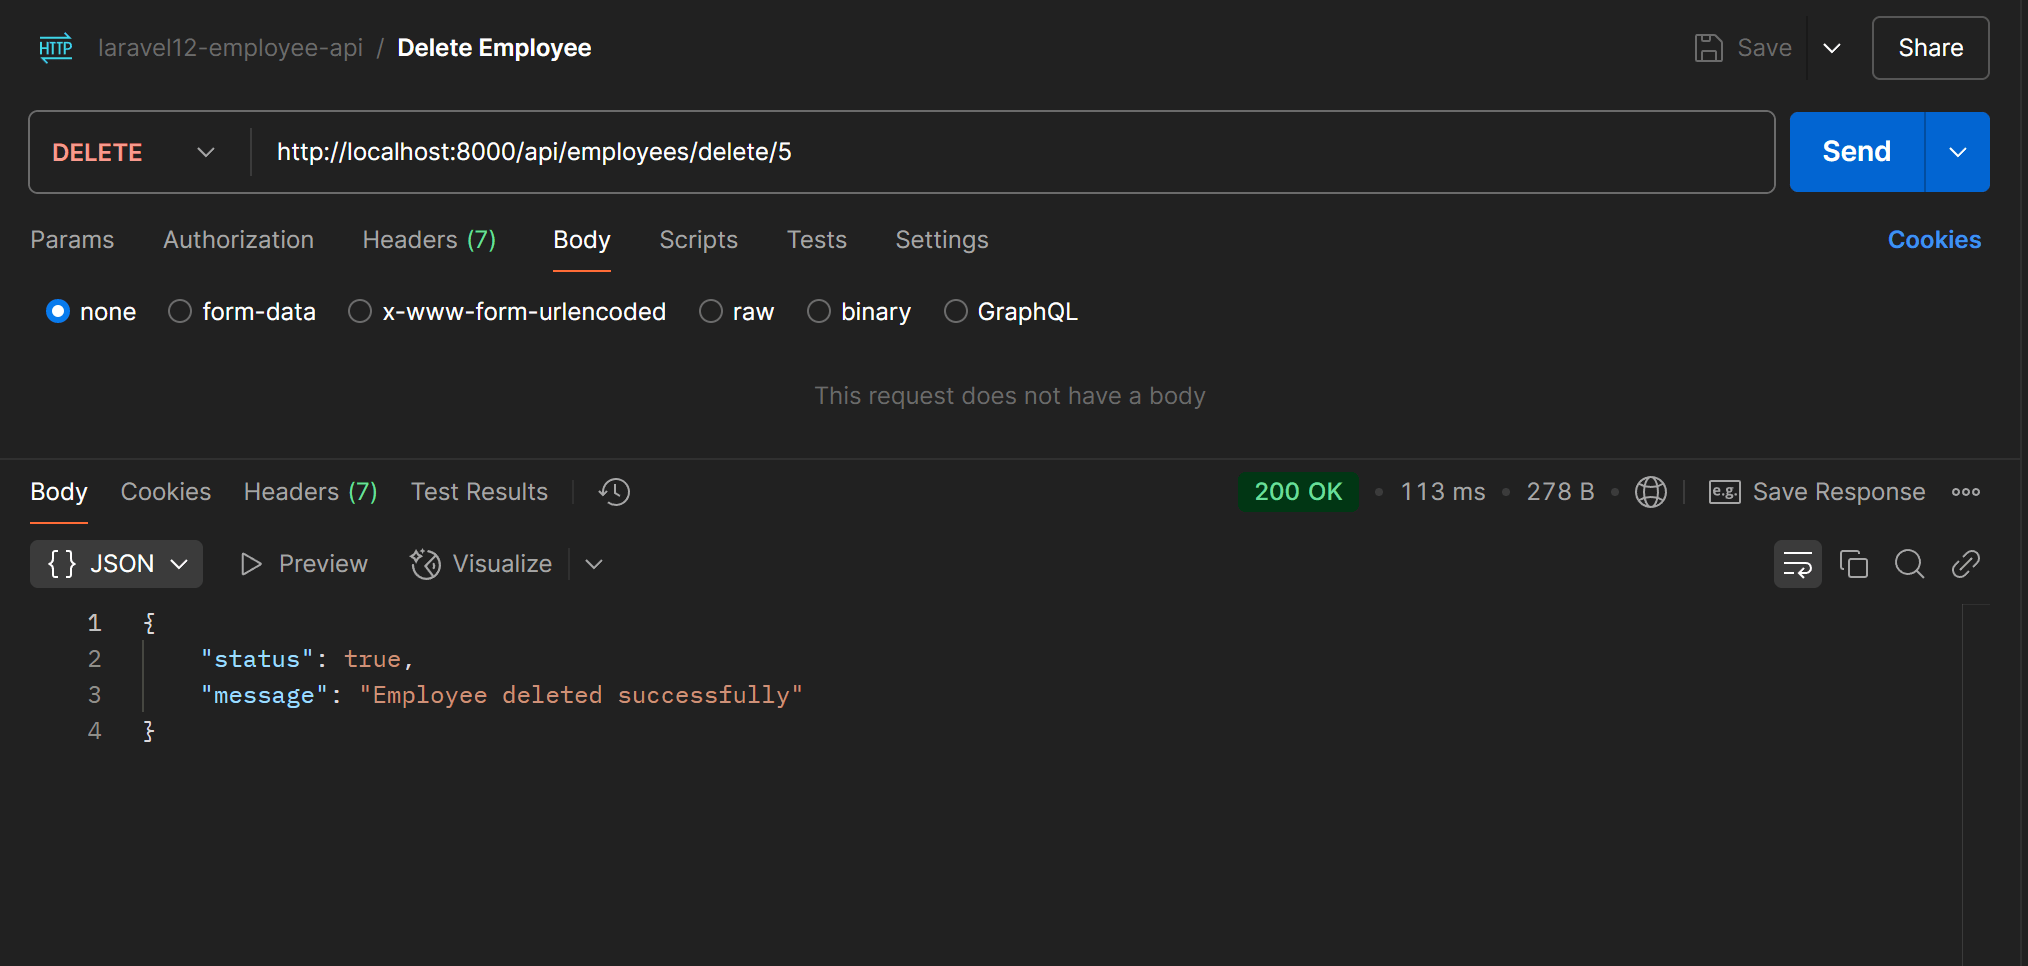
DELETE Request: Remove an employee by ID
DELETE http://localhost:8000/api/employees/delete/{id}
Conclusion
You have successfully built a REST API in Laravel 12! This guide covered database setup, CRUD operations, API routing, and testing. You can now extend this API with authentication, pagination, and more.
Let me know if you need further improvements!
Get the complete source code on GitHub: Click here to download Code


0 Comments